Set Up a Trigger for a Zap
| Platform: | AvailableWebNot availableMobile |
|---|---|
| Plan Type: | Not availableBasicNot availableEssentialAvailablePremiumAvailableEnterprise |
| User Type: | Not availableRequesterNot availableFull UserAvailableAdministrator |
You can trigger a Zap based on events that occur in MaintainX®, or events that occur in any other app supported by Zapier.
If you want an event in MaintainX to trigger your Zap, do one of the following:
- Use Built-In Zapier Triggers
- Use Webhooks for Custom Triggers
Use Prebuilt Zapier Triggers
Zapier has prebuilt triggers for the following events in MaintainX:
| Trigger | Event |
|---|---|
| New work order | A new work order is created in MaintainX |
| Work order status change | The status of an existing work order changes to a different status |
| New Work Order Category Added | A category is assigned to a work order |
Set Up a Prebuilt Trigger
In Zapier:
-
Create a new Zap.
-
Edit the Trigger.
-
When prompted to choose an app, select MaintainX
-
Select a Trigger event.
-
In the Account field, select your MaintainX API Key.
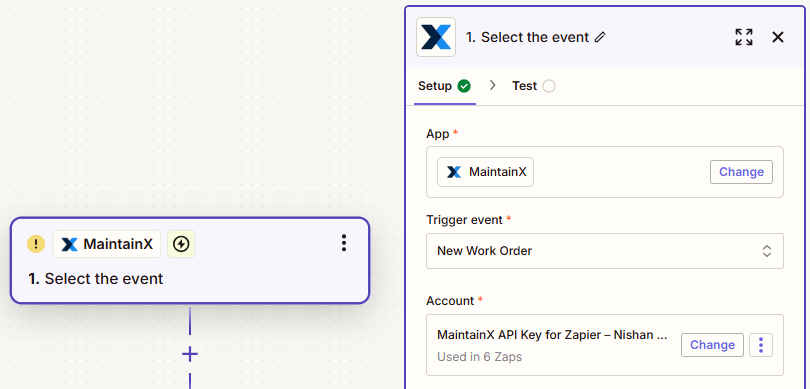
MaintainX trigger configuration in Zapier -
Test the trigger to pull in sample data.
Create a Custom Trigger with Webhooks
If the prebuilt MaintainX triggers aren't what you need, you can use a webhook instead. For a list of MaintainX webhooks and their parameters, see the Subscriptions and Webhooks section in the MaintainX API Documentation.
Set Up a Custom Trigger
In Zapier:
-
Create a new Zap.
-
Edit the Trigger.
-
When prompted to choose an app, select Webhooks.
-
In the Trigger event field, select Catch Hook.
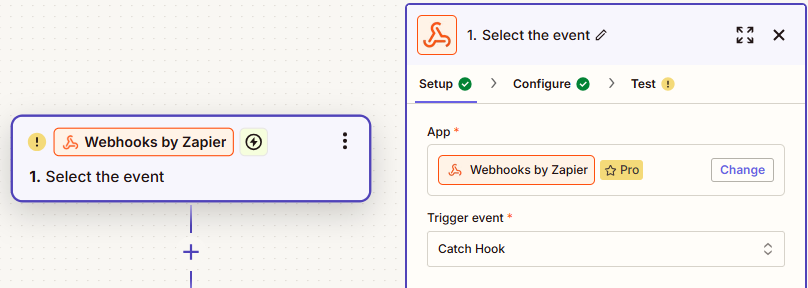
Setting up a custom webhook trigger in Zapier -
Zapier generates a webhook URL. Copy it to the clipboard.
In MaintainX:
-
From the sidebar, select Settings, and under ORGANIZATION SETTINGS, select Integrations.
-
On the Integrations page, select Webhooks to display the Webhook Endpoints options.
-
Select + Add Webhook
-
In the Trigger Webhook On field, select the event that should trigger the webhook (e.g. New Work Request).
-
In the Endpoint field, paste the Zapier webhook URL.
-
(Optional) Set any of the other webhook options as needed.
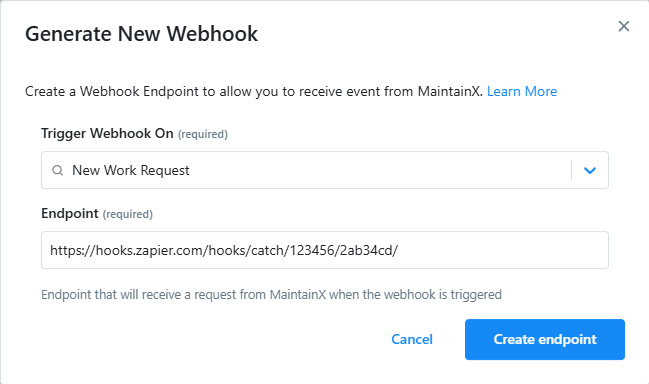
Generating a new webhook URL in MaintainX -
Select Create Endpoint.
To test your Zap:
-
In MaintainX: Perform the action you set as the webhook trigger.
-
In Zapier: Select Test trigger.
The Test screen of your Zap should display the data it receives from MaintainX.
MaintainX will now trigger your Zap whenever the webhook trigger you selected occurs.