View and Filter Parts
| Platform: | AvailableWebAvailableMobile |
|---|---|
| Plan Type: | Not availableBasicNot availableEssentialAvailablePremiumAvailableEnterprise |
| User Type: | Not availableRequesterAvailableFull UserAvailableAdministrator |
This article explains how to use different views in the Parts module.
View Parts in the Web App
The MaintainX® web application has the following views:
- Panel View: shows a list of parts, and details about the selected parts side by side.
- Table View: lists parts in a table where you can sort them and select them in bulk.
Panel View
To access the panel view:
From the sidebar, select Parts Inventory. In the Parts Inventory module, select the (Panel View) icon.
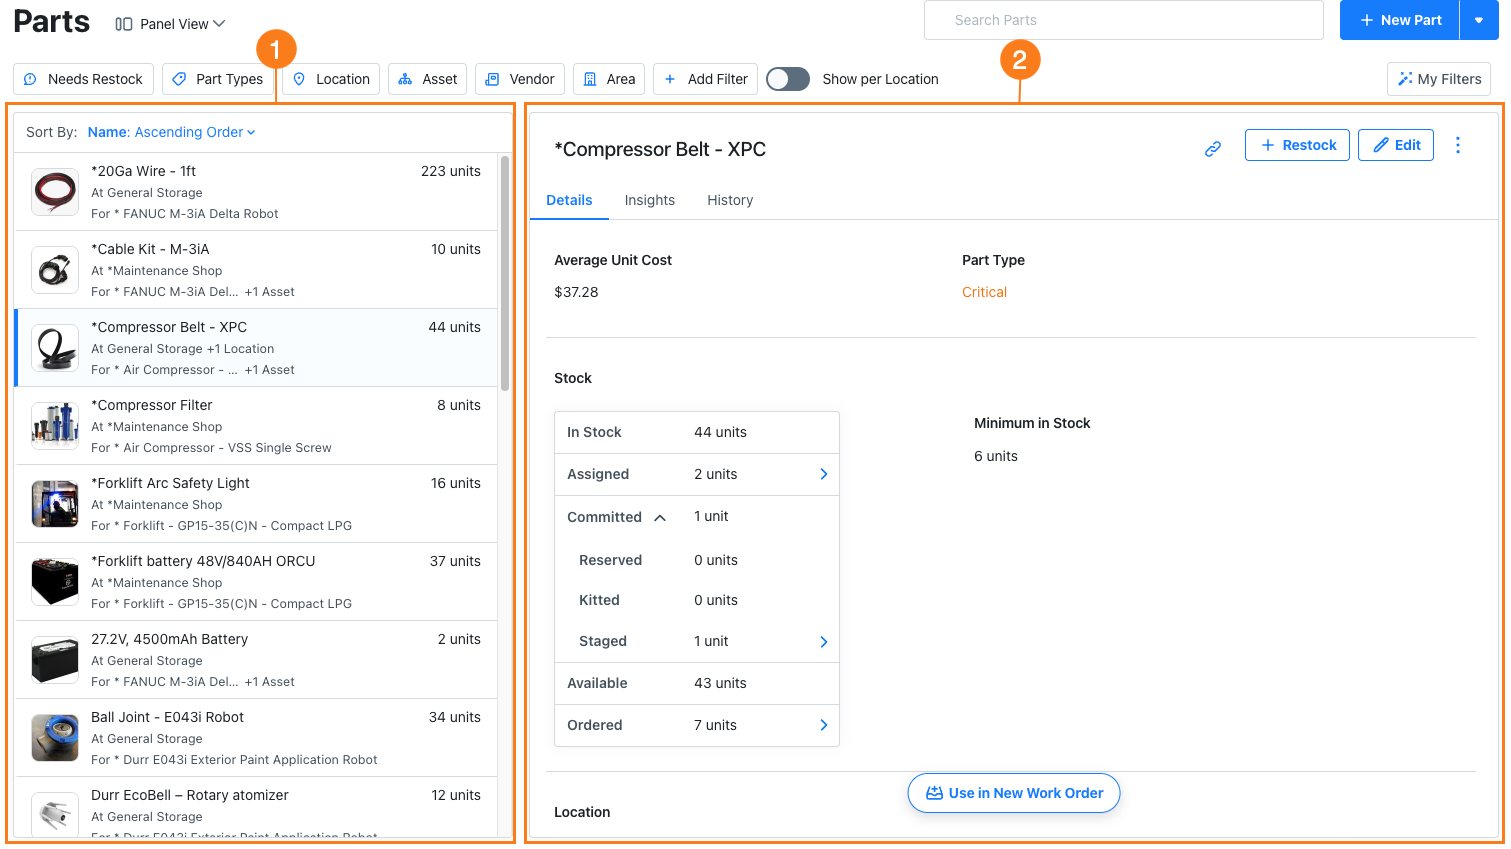
The list pane 1 shows the list of parts in your organization.
- Use the Sort By option to choose how to see your parts listed.
- You can add filters to choose how you want to see the parts listed.
You can also quickly see the number of parts you have in stock next to the part's name. If the number of parts appears in red, it means the units in stock are below the part's minimum set quantity. This is a good indicator that you should consider ordering the part.
If your plan includes multi-location parts, you can toggle the Show per Location option to display a list item for each part location. I.e., a part that's stocked in three locations will have three items in the list pane. Each item shows the quantity for its location. For more information, see View Inventory for Multi-Location Parts.
Select a part from the list to display the details pane 2. The details pane displays the parts form fields and additional inventory part fields for the selected part. For more information about parts form fields, see Parts Form Fields.
Additional Part Fields
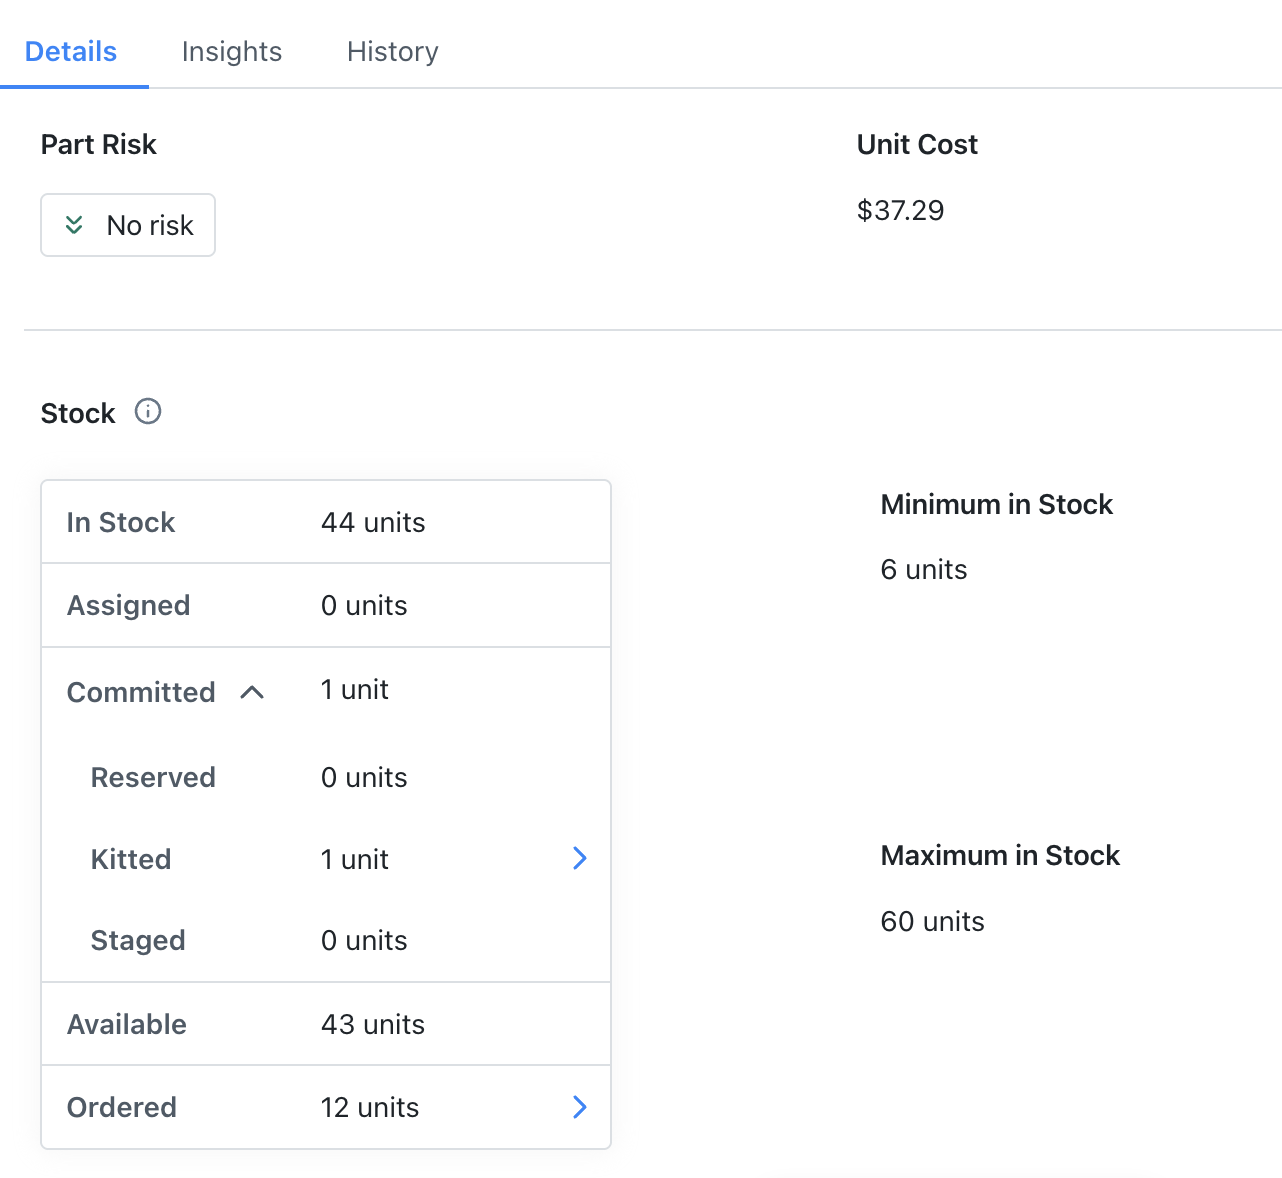
In the Details tab, there are a few fields that give you additional information on the part’s inventory.
| Field | Description |
|---|---|
| Average Unit Cost | Average cost per unit. This value is used in the Time & Cost Tracking section when a part is used in a work order. |
| Part Type | Custom labels that you can apply to categorize parts. You can use this field for filtering and reporting. Part types can also help alert escalation teams when the quantity of a Critical part in your inventory goes below the minimum level. If you want escalation teams to be notified, make sure to add the Critical part type. |
| Stock | A breakdown of your part's inventory by status. In Stock: Total units on hand. Assigned: Units tied to a work order, but that are still included in the Available quantity. Committed (Reserved, Kitted, and Staged): Units allocated to a work order and subtracted from the Available quantity. Available: Units not yet allocated to a work order. Ordered: Units on an in-progress purchase order. |
| Minimum in Stock | Number of units you want to keep in inventory at all times. If the part is set as Critical and there is an escalation team set up, the escalation team receives an alert by email when this number drops below the set minimum. |
| Maximum in Stock | The maximum number of units to keep in inventory. When you create a purchase order, MaintainX uses this value to automatically calculate the suggested order quantity. For multi-location parts, the value suggested is the aggregated total across all locations. For more information, see Order and Restock Parts. |
For more information about how to read additional part fields, see Understanding Part Quantities.
In the detail pane 2, the History tab lists all work orders where the part was used, and any inventory changes. For more information on work order history, see View Parts Data.
Table View
To access the table view:
- From the sidebar, select Parts Inventory.
- In the Parts Inventory module, select the (Table View) icon.
The Table view is a compact table of parts and parts form fields. It gives you an overview of the parts in your organization. You can also use it to bulk-select parts (see Bulk Select Parts).
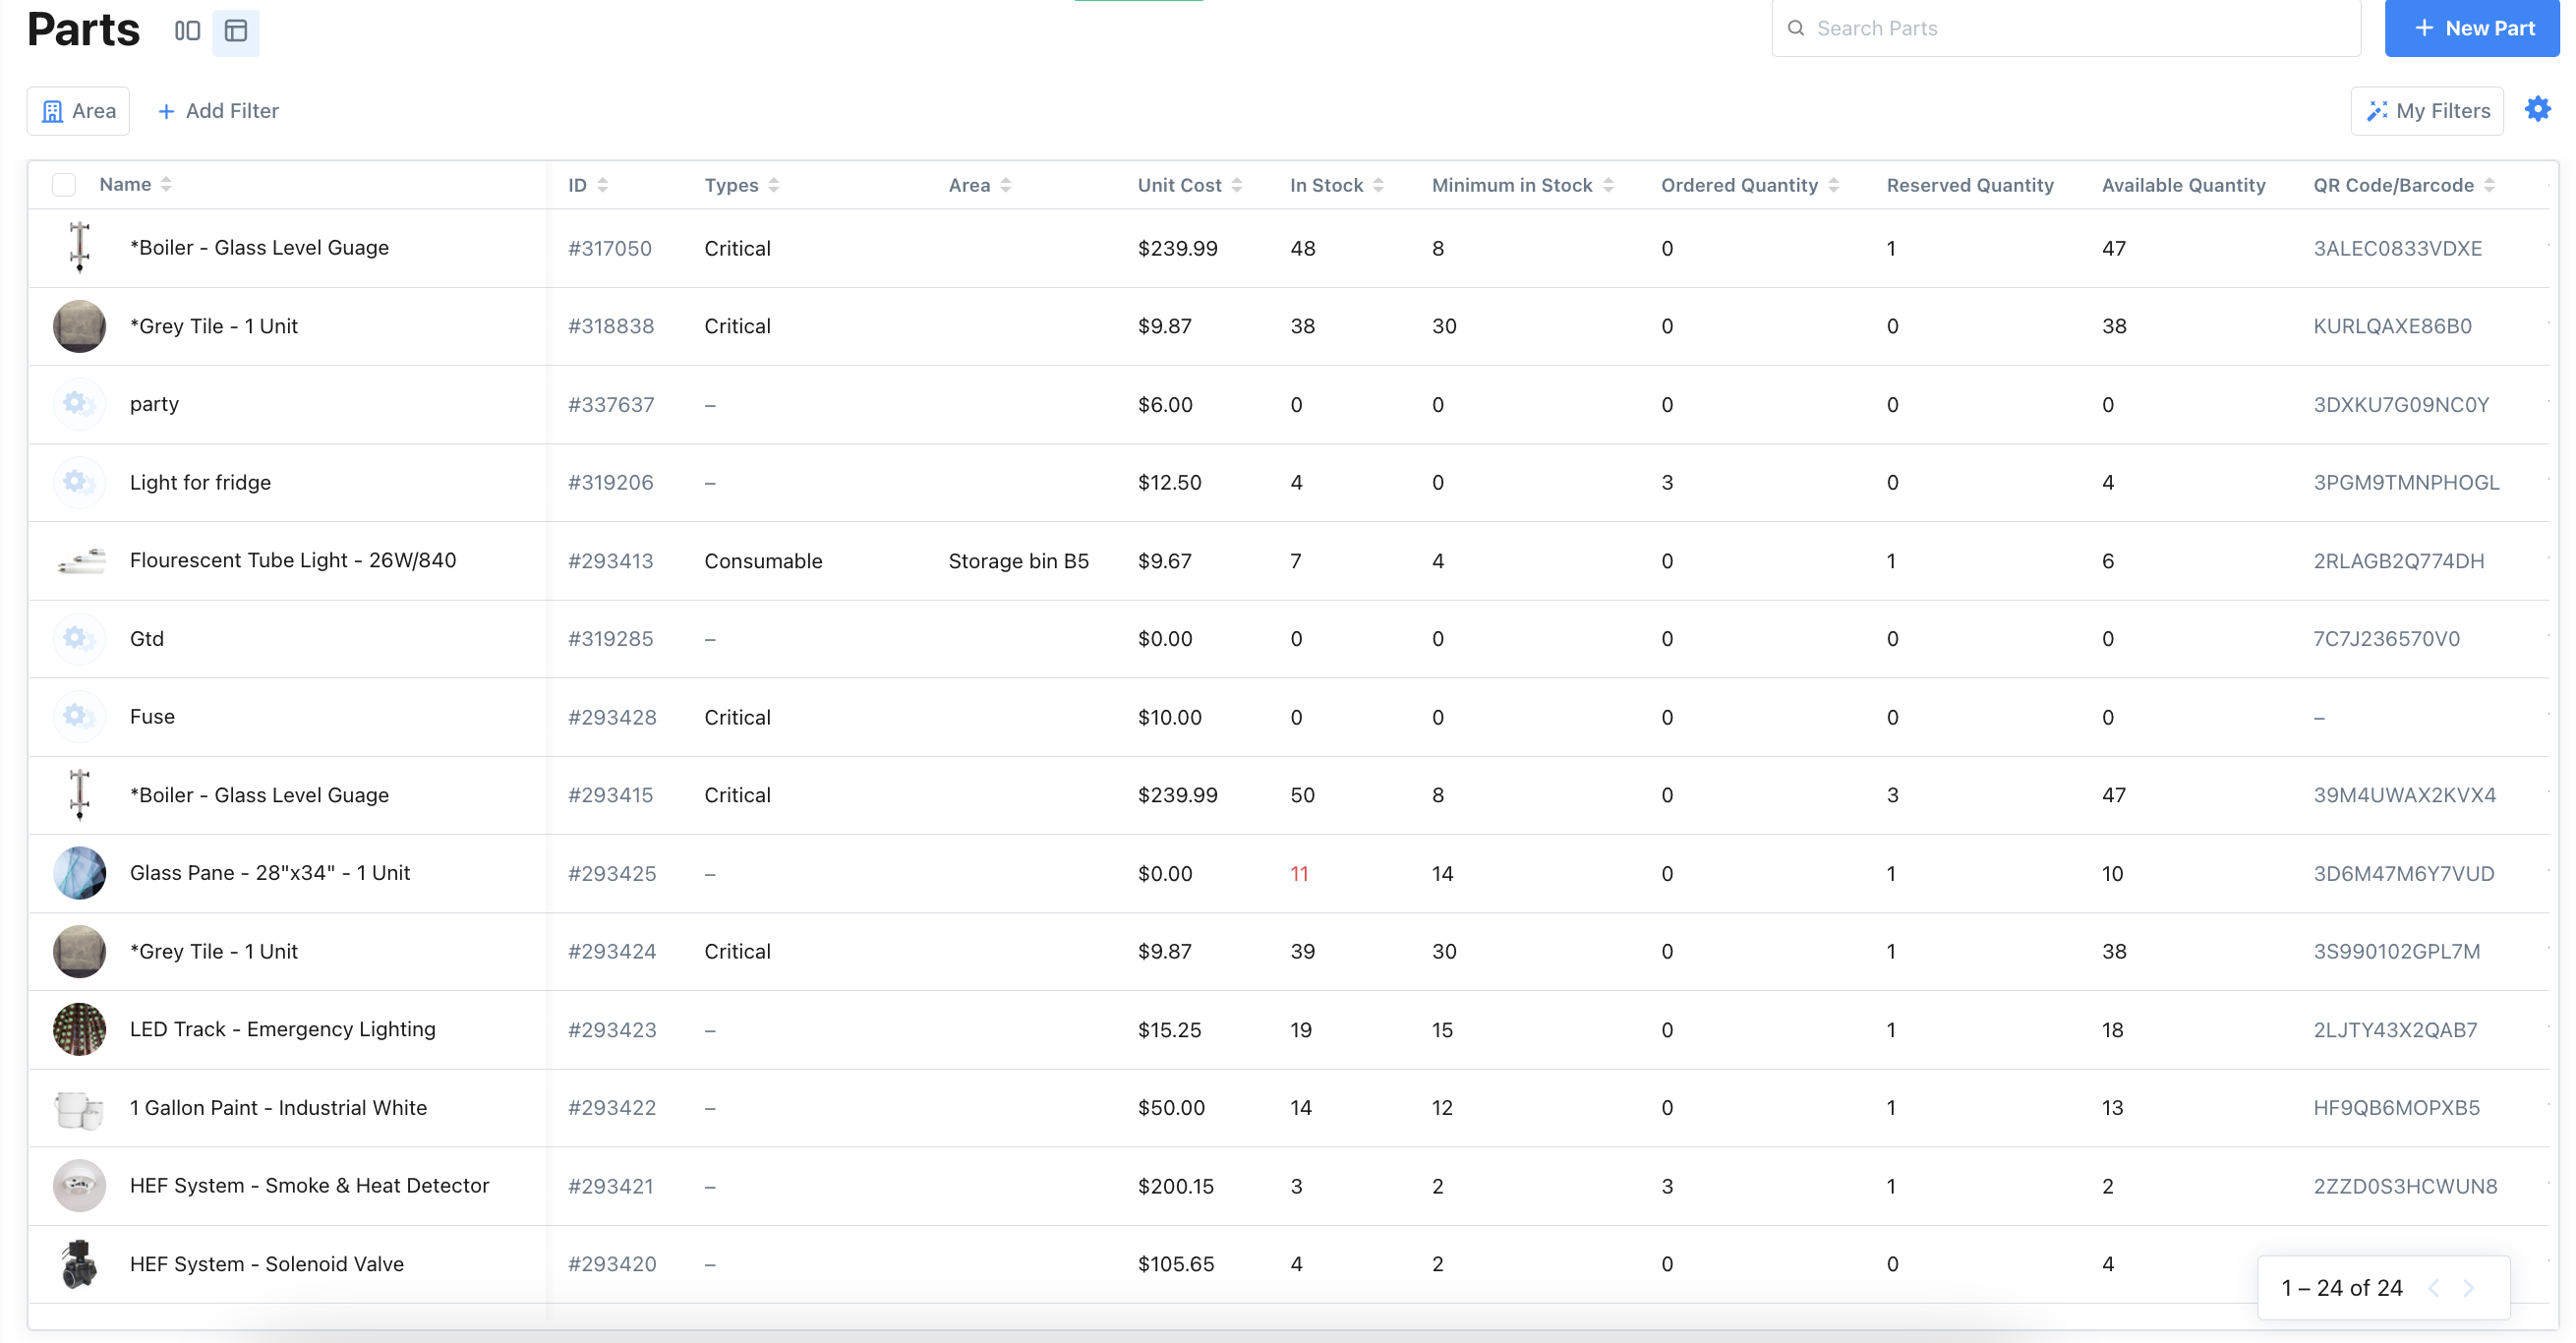
If your plan includes multi-location parts, you can toggle the Show per Location option to display a row for each part location. I.e., a part that's stocked in three locations will have three rows in the Table view. Each row shows the quantity for its location. For more information, see View Inventory for Multi-Location Parts.
Table View Settings
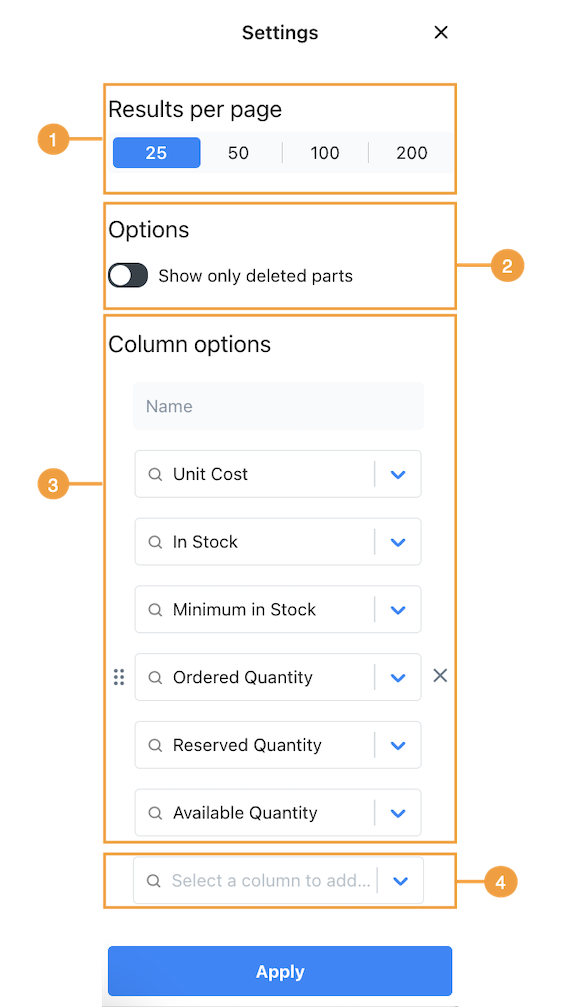
In table view, select (Settings) for more options.
| Section | Description | |
|---|---|---|
| 1 | Results per page | The number of parts to display per page. |
| 2 | Show only deleted parts | Toggle this option on to show deleted parts in the table view. |
| 3 | Column options | Lists the columns that appear in the table. Change the order of columns by dragging the (reorder) icon. Select the (close) icon to remove columns from the table. |
| 4 | Select a column to add | Select the dropdown to show the list of additional columns you can add. Select a column name to add the column to the table. |
When you’re finished making changes, select Apply.
View Parts in the Mobile App
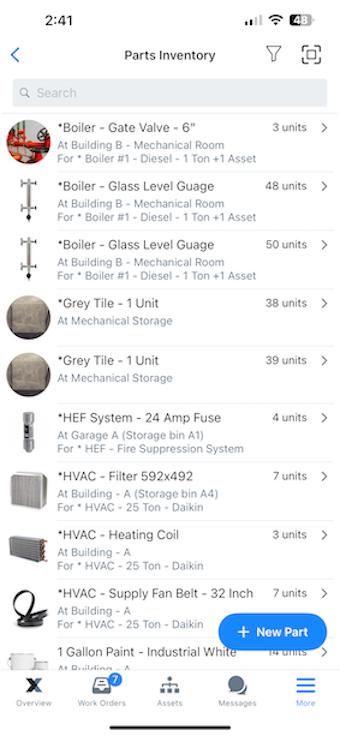
List View
The List View is a compact list of parts in your organization.
To access the list view:
- From the bottom navigation bar, select More.
- On the More Options screen, navigate to Product Features, and select Parts Inventory.
To see details for a part, select the part’s name.
If your plan includes multi-location parts, you can toggle the Show inventory per Location option to display a list item for each part location. I.e., a part that's stocked in three locations will have three items in the List view. Each item shows the quantity for its location. For more information, see View Inventory for Multi-Location Parts.
Filter in the Parts Inventory Module
Use filters to control which parts appear in the Parts Inventory module. You can filter by most part properties. For example, you can choose a filter to only see parts in a specific area.
Add a Filter
- Web
- Mobile
-
Select + Add Filter.
-
Choose a part field from the list. The field is added to the filter bar.
-
Select the new field to open its filter options.
-
Choose a filter condition. The condition determines what makes a part match the filter.
-
Select Reset Filters to remove your filter criteria if needed.
Condition Description Notes One of Finds parts where the filter field matches one or more values that you specify. Use this to include specific parts in the view. None of Finds parts where the filter field does not match any of the values that you specify. Use this to exclude specific parts from the view. Is empty Finds parts where the filter field has no value. Is not empty Finds parts where the filter field is the value.
-
Select the (Filter) icon to add a filter.
noteIf there are active filters, a small dot appears on the filter icon.
-
In the Add Filter options, choose a part field to display the Filter by options.
-
Choose a filter condition. The condition determines what makes a part match the filter.
Condition Description Notes One of Finds parts where the filter field matches one or more values that you specify. Use this to include specific parts in the view. None of Finds parts where the filter field does not match any of the values that you specify. Use this to exclude specific parts from the view. Is empty Finds parts where the filter field has no value. Is not empty Finds parts where the filter field is the value. -
Select Done to return to the Add Filter options. Add more filters as needed.
-
To apply your filter, select Apply.
-
Select Clear Filters to remove your filter criteria if needed.
Some filters have different or more specific conditions. For example, the conditions for the Needs Restock filter are: In Stock, Need Restock, or Out of Stock.
Save Filters
You can only save filters in the web application.
You can save the current filters in the Parts Inventory module as a preset that you can reuse later. By default, a saved filter is only available to you. When you save a filter, you can choose to make it visible to your whole organization.
- Create a filter as described in Add a Filter.
- In the filter toolbar, select Save Filters.
- In the Save to my Filters dialog box, enter a name for the new filter.
- (Optional) As an Administrator, if you want to make the saved filter an organization-wide filter, select Make this filter visible organization wide.
- Select Submit to save.