View and Filter Assets
| Platform: | WebMobile |
|---|---|
| Plan Type: | BasicEssentialPremiumEnterprise |
| User Type: | RequesterFull UserAdministrator |
This article explains how to use the different views in the Assets module to view assets, and how to use filters to control which assets you see.
View Assets in the Web App
The MaintainX® web app has the following asset views:
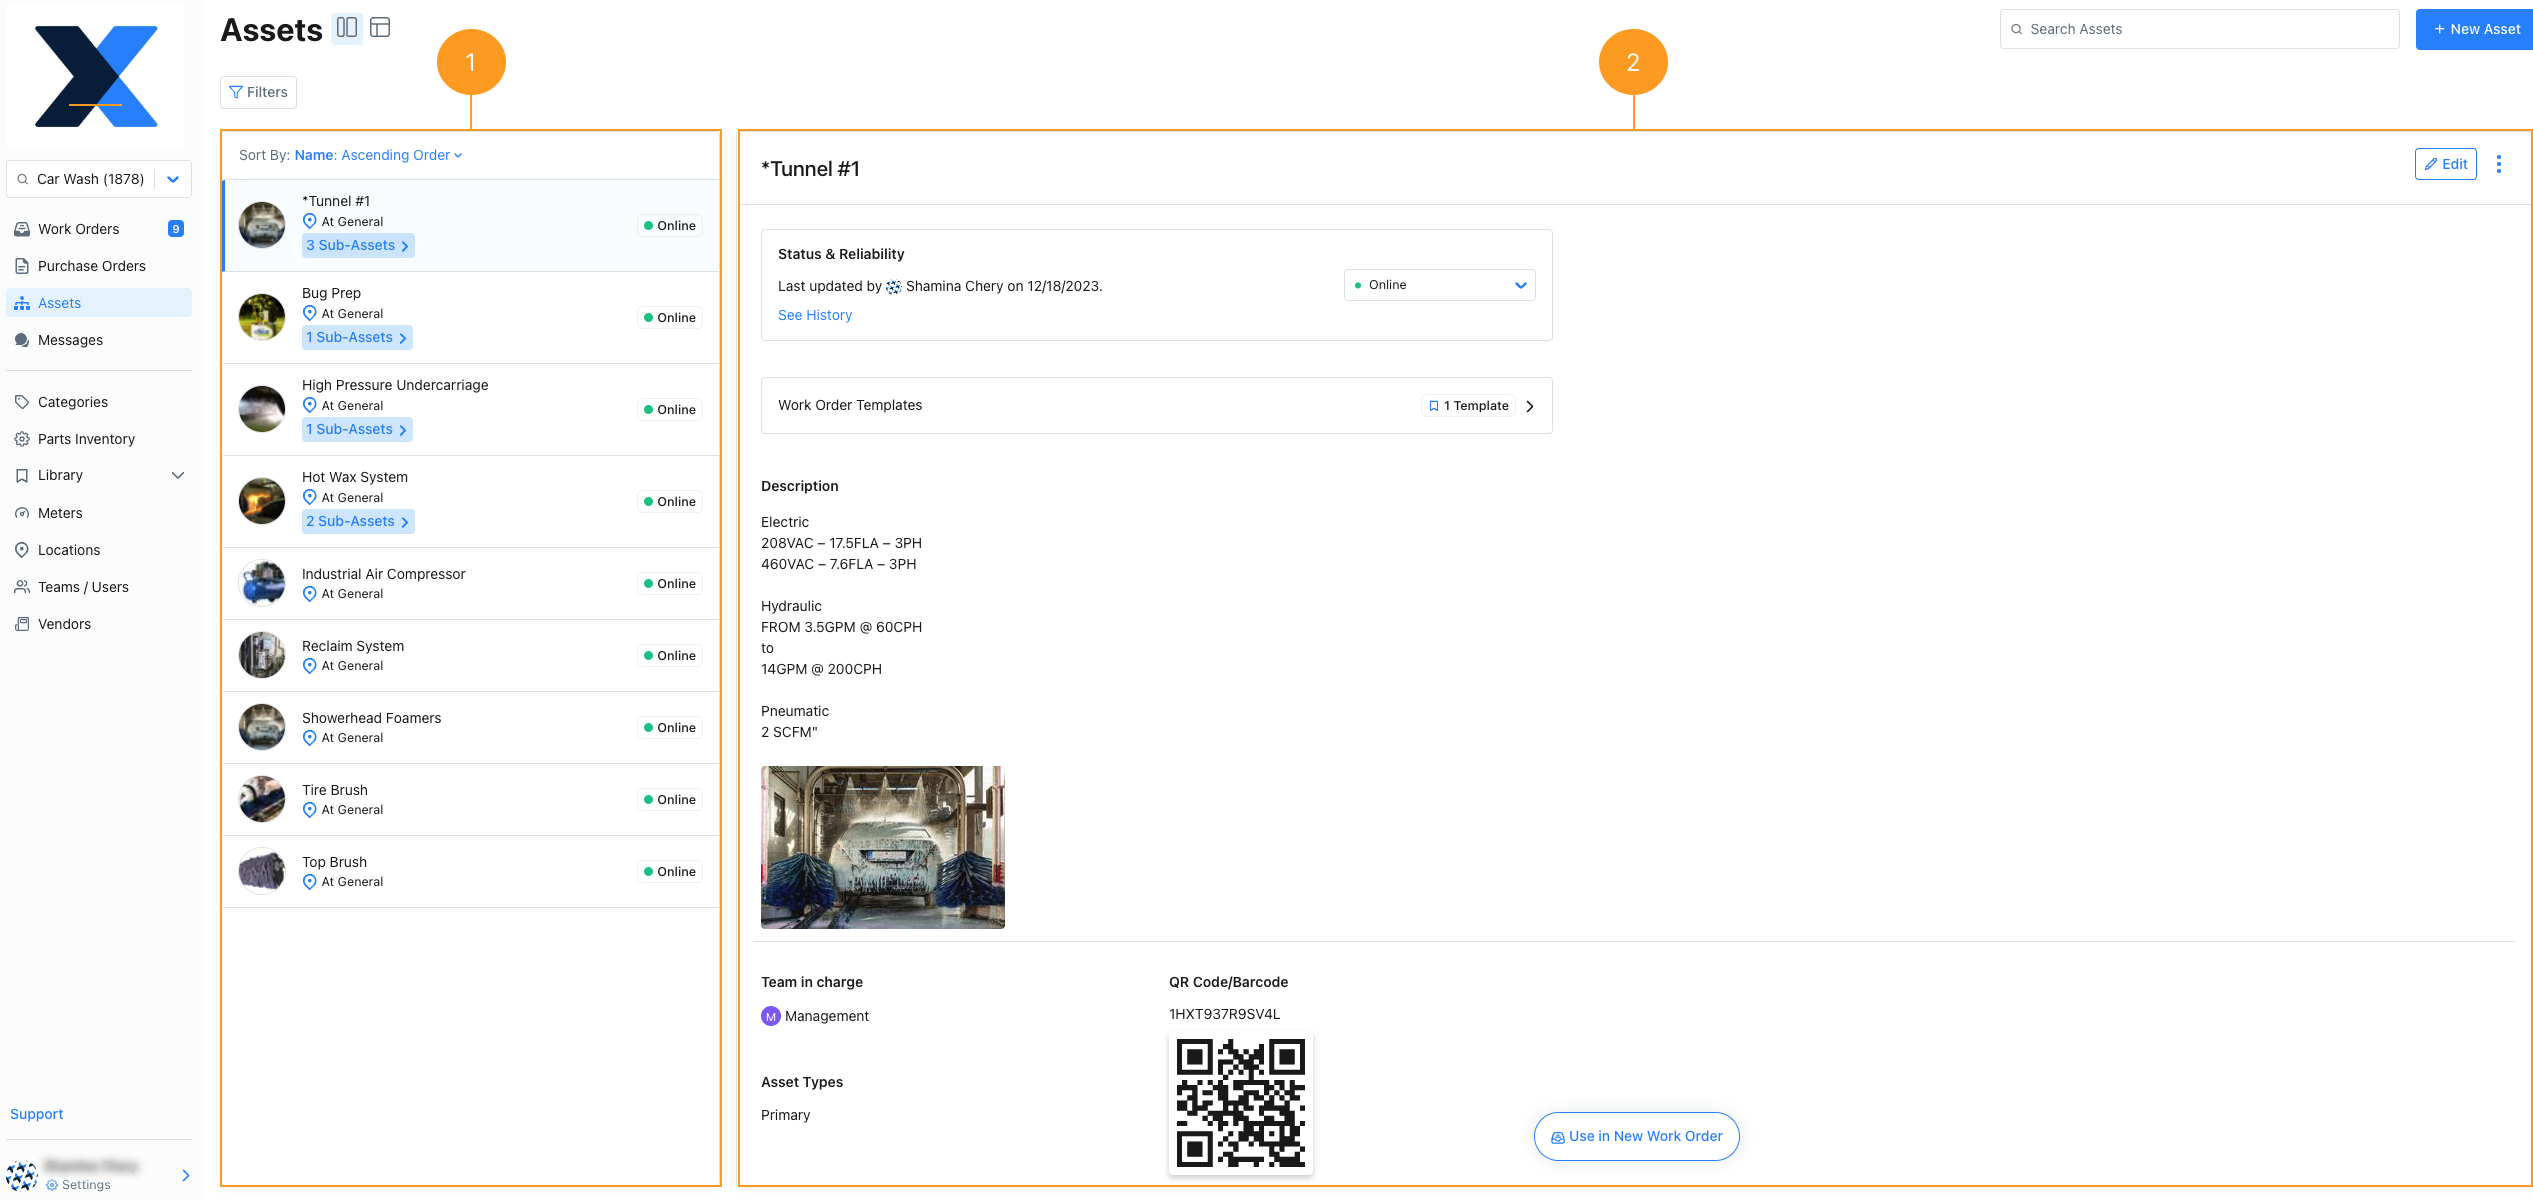
- Panel View: shows a list of assets, and details about the selected asset side by side.
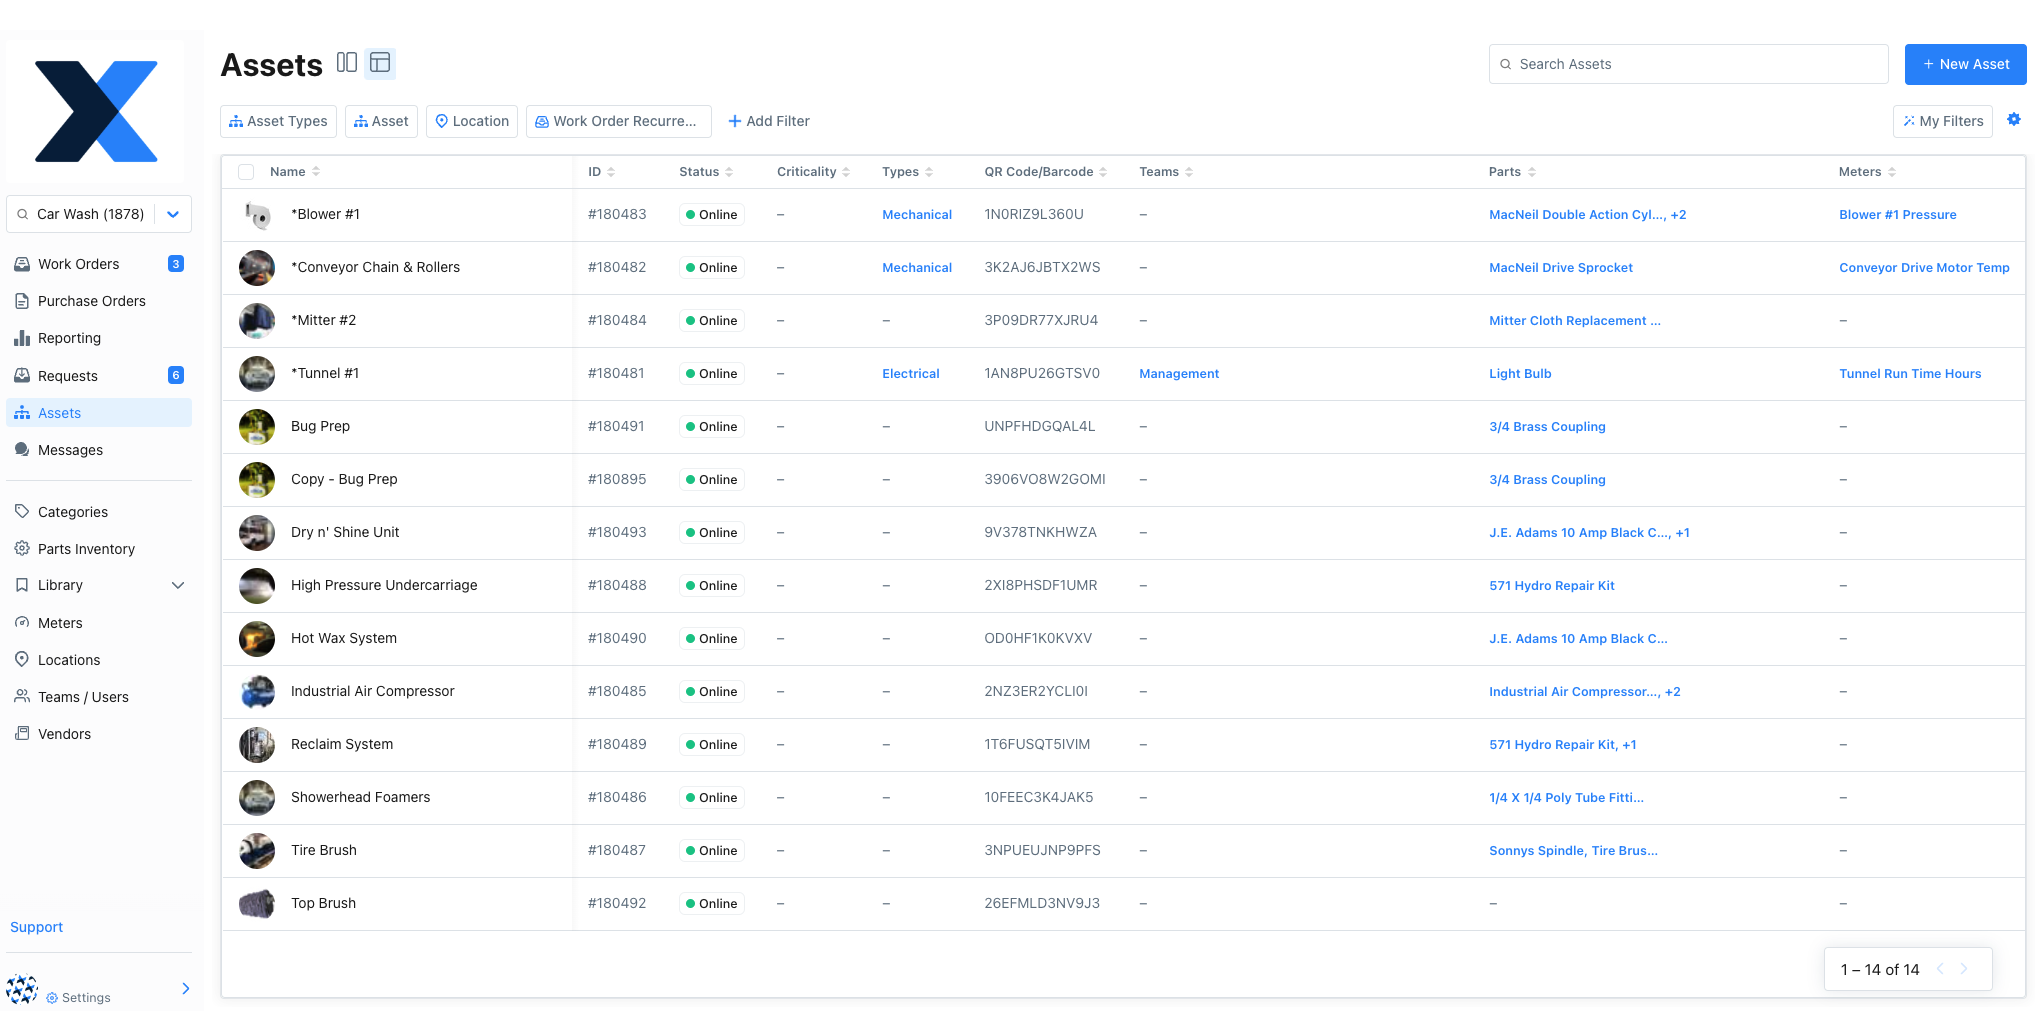
- Table View: lists assets in a table where you can sort them, and edit them in bulk.
Panel View
To access the panel view:
- From the sidebar, select Assets.
- In the Assets module, select the (Panel View) icon to switch to the Panel view.
The list pane on the left shows the list of assets in your organization.
- Use the Sort By option to choose how you want to see your assets listed.
- Select an asset from the list to display the details pane on the right. The details pane displays the form fields for the selected asset.

| Section | Description | |
|---|---|---|
| 1 | List pane | Lists your organization’s assets. |
| 2 | Details pane | Displays the selected asset’s fields. |
Table View
To access the table view:
- From the sidebar, select Assets.
- In the Assets module, select the (Table View) icon to switch to the Table view.
The Table view is a compact table of assets and asset form fields. It gives you an overview of the assets in your organization. You can also use it to bulk-edit assets (see Bulk Edit Assets).
In Table View, all your organization’s assets appear in the same flat list. If your plan includes parent and sub-assets (see Asset Hierarchies), sub-assets are not grouped with their parent assets.

Table View Settings
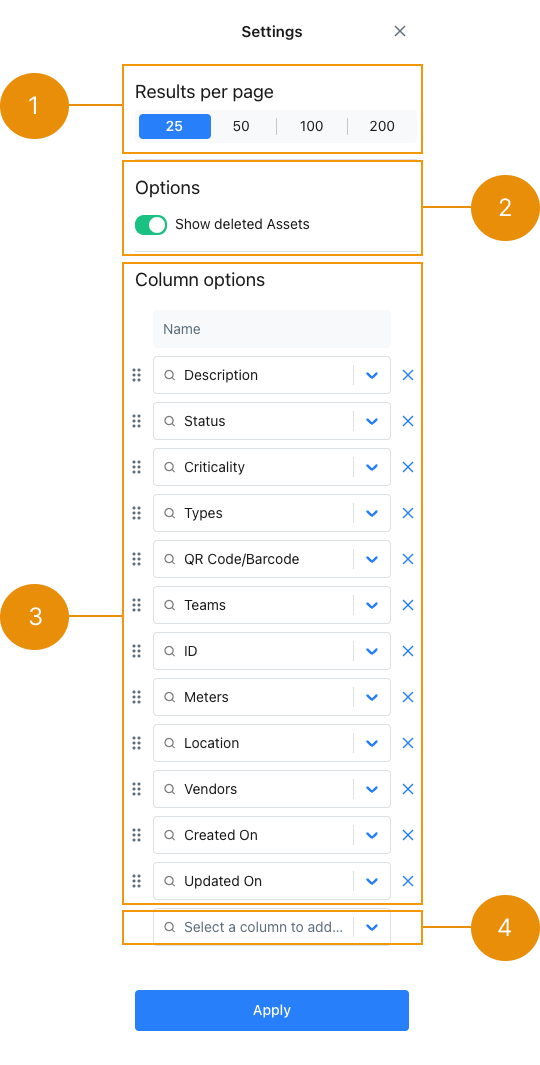
In Table View, select (Settings) for more options.

| Option | Description | |
|---|---|---|
| 1 | Results per page | The number of assets to display per page. |
| 2 | Show deleted Assets | Toggle this option on to show deleted assets in the table view. Rows for deleted assets are highlighted. |
| 3 | Column options | Change the order of columns by dragging the (reorder) icon. Select the X icon to remove columns from the table. |
| 4 | Select a column to add | Select the dropdown to show the list of additional columns you can add. Select a column name to add the column to the table. |
When you’re finished making changes, select Apply.
Filters in the Assets Module
Use filters to control which assets appear in the Assets module. You can filter by most asset properties. For example to only see assets with a specific status or type.
Add a Filter
- Web
- Mobile
-
Select + Add Filter.
-
Choose an asset field from the list. The field is added to the filter bar.
-
Select the new field to open its filter options.
-
Choose a filter condition. The condition determines what makes an asset match the filter.
Condition Description Notes One of Finds assets where the filter field matches one or more values that you specify. Use this to include specific assets in the view. None of Finds assets where the filter field does not match any of the values that you specify. Use this to exclude specific assets from the view. Is empty Finds assets where the filter field has no value. Is not empty Finds assets where the filter field is the value.
Select Reset to remove your filter criteria if needed.
-
From the bottom navigation bar, select Assets.
-
Select the (Filter) icon to add a filter.
noteIf there are active filters, a small dot appears on the filter icon.
-
In the Add Filter options, choose an asset field to display the Filter by options.
-
In the Filter by options, choose a filter condition. The condition determines what makes the asset match the filter.
Condition Description Notes One of Finds assets where the filter field matches one or more values that you specify. Use this to include specific assets in the view. None of Finds assets where the filter field does not match any of the values that you specify. Use this to exclude specific assets from the view. Is empty Finds assets where the filter field has no value. Is not empty Finds assets where the filter field is the value. -
Choose an asset field as a value.
-
Select Done to return to the Add Filter options. Add more filters as needed.
-
To apply your filter, select Apply.
Select Clear Filters to remove your filter criteria if needed.
For optimal search using Asset Filters, we recommend including as much relevant information as possible to your asset form fields when you create assets. For more information, see Create an Asset.
Save Filters
You can only save filters in the web app.
You can save the current filters in the Assets module as a preset that you can reuse later. By default, a saved filter is only available to you. When you save a filter, you can choose to make it visible to your whole organization.
- Create a filter as described in Add a Filter.
- In the filter toolbar, select Save Filters.
- In the Save to my Filters dialog box, enter a name for the new filter.
- If you want to make the saved filter an organization-wide filter, select Make this filter visible organization wide.
- Select Submit to save.
You cannot change a filter after you save it. If you want to make an already saved filter visible to your whole organization, you have to recreate it and resave it as an organization-wide filter.